Rating: 4.5/5
Icon Resin Infiltration Review
Icon resin infiltration is DMG's drill-free system for early enamel caries and white spot lesions. This review draws on chairside use across post-orthodontic, fluorosis, MIH, and...
Reviewed by Rachel Thompson
Pros
- Arrests early caries while removing only about 40 µm of enamel per etch
- Needs no drilling or anesthesia, which suits anxious patients and children
- Has seven-year randomized data for non-cavitated proximal lesions
- Clears many post-orthodontic white spots in a single visit
- Keeps proximal contacts and marginal ridges intact
- Gives a reliable chairside preview during the Icon-Dry step
- Requires no capital equipment
Cons
- Demands strict isolation, ideally with a rubber dam
- Does not show on radiographs, so charting becomes essential
- Works only on non-cavitated lesions no deeper than the outer third of dentin
- Gives partial results on many MIH opacities
- Leaves brown pigmentation untouched without separate treatment
- Uses etch quickly in cases that need several cycles
- Adds chair time under the longer 2026 infiltration guidance
Icon resin infiltration is DMG's drill-free system for early enamel caries and white spot lesions. This review draws on chairside use across post-orthodontic, fluorosis, MIH, and proximal cases to show where the kit earns its place and how to set up the protocol for consistent results.
TL;DR
Icon stops non-cavitated proximal lesions, and a seven-year randomized trial found progression in 9% of treated lesions versus 45% of controls.
Shallow post-orthodontic white spots usually clear after one etch cycle, while older and fluorotic lesions often need two or three.
The Icon-Dry preview predicts the final result, so clinicians should re-etch until the lesion disappears under ethanol.
Chart every treated surface, because the infiltrant does not show on radiographs.
What Icon Resin Infiltration Does
Icon is a light-cured resin system that seals demineralized enamel from the inside. DMG launched it in 2009 after caries research at universities in Kiel and Berlin, and it remains the reference product in its category.
The infiltrant is an unfilled resin based on triethylene glycol dimethacrylate (TEGDMA) with camphorquinone as the photoinitiator. It is far thinner than any flowable composite. In the syringe it behaves almost like a primer, and on an etched surface it spreads on its own without being pushed around.
Icon belongs to the broader shift toward minimally invasive care. A lesion that would once have been watched for years, or opened with a bur, can be treated in one visit while the enamel shell stays in place.
How The Material Reaches The Lesion
An active enamel lesion has a porous body sitting under a relatively well-mineralized surface layer. Resin cannot pass through that layer, so the first job is to remove it.
Icon-Etch is a 15% hydrochloric acid gel. According to DMG, a two-minute application removes about 40 µm of enamel, which opens the pores underneath. Icon-Dry, a 99% ethanol solution, then pulls water out of the lesion so capillary forces can draw the infiltrant deep into the pore network during the resting time. Light-curing locks the resin in place and closes the pathways that acids use to dissolve mineral.
Why White Spots Fade
The color change is optical. Sound enamel has a refractive index of about 1.62, while the pores of a white spot lesion hold water at about 1.33 or air at 1.0.
Light scatters at each of those boundaries, and the eye reads the scatter as chalky white. The cured infiltrant sits near 1.52, close enough to enamel that scattering drops and the lesion takes on the translucency of the tooth around it. That is also why an incompletely infiltrated lesion keeps a faint cloudy core. The resin never reached that part of the pore system.
Kit Contents And Handling
DMG packages Icon as single-use patient packs. Each pack contains syringes of the three materials and tips shaped for the treatment site.
Product | Main use | Pack contents |
|---|---|---|
Icon Proximal | Non-cavitated interproximal lesions | Syringes of each material, perforated proximal tips, wedges |
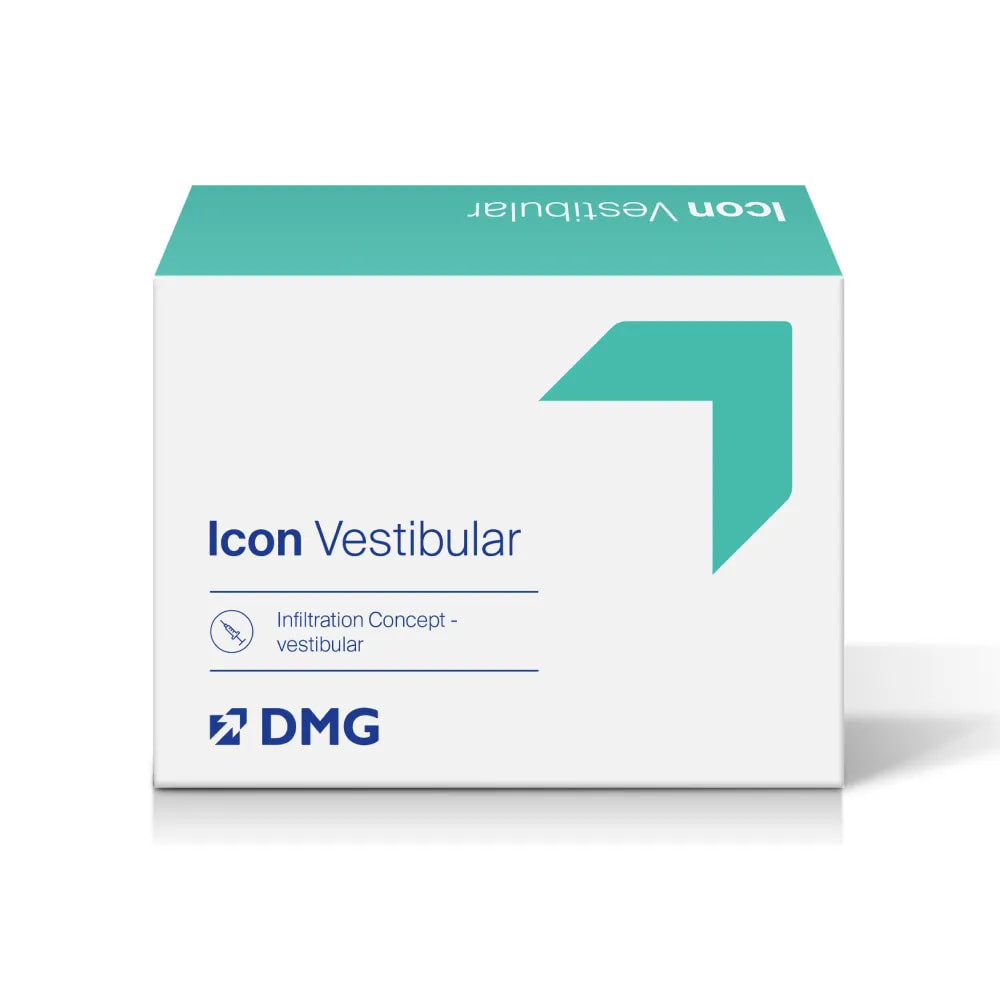
Icon Smooth Surface (Icon Vestibular in the UK and Europe) | Facial white spots, fluorosis, post-orthodontic lesions | Syringes of each material, vestibular tips, Luer-lock tip |
Mini kits | Trial or low-volume use | Two patient packs |
Seven-unit packs | Routine use | Seven patient packs |
Icon-Etch refills | Extra etch cycles | Refill syringes with tips |
In daily handling, the etch gel is viscous enough to stay put on a vertical labial surface, which makes it easy to control near the gingival margin. The vestibular tips have a soft sponge-like end that works the gel gently into the surface. For a typical smooth surface case, one patient pack stretches across several anterior teeth, although three etch cycles on multiple teeth will empty the etch syringe quickly. Keeping a refill syringe in stock avoids opening a second full pack just for etch.
The proximal tips are thin foil sleeves perforated on one side. They slide through a wedged contact with the perforated face toward the lesion, which keeps material off the neighboring tooth. In tight contacts the foil can crumple, and a slow, slightly angled insertion works better than force.
Component | Composition | Role |
|---|---|---|
Icon-Etch | 15% hydrochloric acid gel | Removes the surface layer and opens the lesion body |
Icon-Dry | 99% ethanol | Dries the lesion and previews the final result |
Icon-Infiltrant | Unfilled TEGDMA-based light-cure resin | Penetrates and seals the lesion from within |
Case Selection In Practice
Case selection decides most Icon outcomes, and the material is only as predictable as the lesion it is placed on.
For proximal caries, the ADA guideline panel notes that approximal lesions confined to enamel and the outer third of dentin on radiographs are most likely noncavitated. It lists resin infiltration, alone or with 5% sodium fluoride varnish, among the options it suggests for those lesions in primary and permanent teeth.
Where Icon Performs Well
Icon gives its most consistent results on caries-related lesions with an intact surface.
Post-orthodontic white spots that are no more than a year or two old
Active non-cavitated lesions on facial and lingual smooth surfaces
Proximal lesions from outer enamel (E1) to the outer third of dentin (D1) on bitewings
High-risk patients whose lesions kept progressing with fluoride alone
Where Results Get Less Predictable
Developmental opacities behave differently from caries because the defect often sits deeper or under a harder surface.
Mild fluorosis usually improves, although the hypermineralized surface often needs extra etching
Fluorosis with brown mottling needs whitening or microabrasion before infiltration
White or cream MIH opacities improve partially in many cases
Yellow-brown MIH opacities and teeth with enamel breakdown rarely justify infiltration
Presentation | Predictability | Clinical note |
|---|---|---|
Post-orthodontic white spots, recent | High | Often clears after one etch |
Post-orthodontic white spots, several years old | Moderate to high | Thicker surface layer, more etch cycles |
Proximal E1 and E2 lesions | High | Best-documented indication |
Proximal D1 lesions | Moderate to high | Confirm the surface is intact |
Mild diffuse fluorosis | High | Whitening first improves the blend |
Fluorosis with brown staining | Moderate | Pigment needs separate treatment |
MIH white or cream opacities | Variable | Partial masking is common |
MIH yellow-brown opacities | Low | Usually a restorative case |
Limitations Worth Planning Around
A few limitations shape how Icon fits into a practice, and each one is manageable once the team knows about it.
Cavitated lesions cannot be sealed, since the resin does not rebuild lost structure.
Lesions beyond the outer third of dentin fall outside the indication.
Patients with a known methacrylate allergy should not receive the infiltrant.
Subgingival margins and sites that cannot be kept dry give unreliable results.
The limitation with the longest tail is radiographic. DMG confirms the infiltrant is not radiopaque, so an arrested proximal lesion still looks radiolucent at the next bitewing. Without a clear chart note, a future clinician can easily read that shadow as active caries and prepare the tooth. Careful charting belongs in every Icon appointment.
Chairside Protocol And Clinical Observations
The steps below follow DMG's established instructions, with notes on how each step behaves in real use. DMG updated its North American guidance in 2026 with longer infiltration times, so the current IFU should always take precedence.
Isolation
Moisture control is the step that most often separates a clean result from a patchy one.
DMG strongly recommends a rubber dam, and chairside experience supports that advice for two reasons. Saliva contamination after etching stops infiltration in the affected area, and the hydrochloric acid gel irritates gingiva on contact. A light-cured liquid dam can work on labial surfaces of cooperative patients. For posterior proximal work, a suction-based system such as DryShield helps with tongue control but does not replace a dam when saliva control is marginal.
Before isolating, it pays to photograph the teeth and assess lesion depth with transillumination. Once the dam is on, the teeth dehydrate and every white spot looks worse, which makes baseline assessment unreliable.
Etching And The Icon-Dry Preview
The etch and dry cycle is where Icon cases are won or lost.
Apply Icon-Etch with a vestibular tip for 2 minutes, working it gently into the surface and extending past the visible margins.
Rinse for at least 30 seconds and air-dry.
Apply Icon-Dry for 30 seconds and watch the lesion closely during the first few seconds.
Proceed to infiltration if the lesion vanishes almost immediately under the ethanol.
Re-etch if the lesion fades slowly or leaves a visible core, up to three 2-minute cycles per lesion.
The preview is reliable. Whatever remains visible under the ethanol will almost always still be visible after curing, and a lesion that disappears quickly tends to stay hidden. The common mistake is moving on after one etch because the lesion looks "mostly" gone. Under-extending the etch leaves a thin chalky halo at the lesion border, which is harder to fix later than to prevent.
Infiltration And Curing
Infiltration needs time and low light.
Dim the operatory light, since the infiltrant starts to set under strong ambient light.
Apply Icon-Infiltrant generously and keep the surface wet for at least 3 minutes, or longer as the current IFU directs.
Remove excess with a cotton roll and floss the contacts before light-curing for 40 seconds.
Apply a second layer for 1 minute, remove excess, and cure again for 40 seconds.
Polish with discs or rubber cups.
On deeper lesions the surface can look slightly dry partway through the resting time as resin moves inward, and topping it up keeps the capillary flow going. A reliable curing light with a wide tip covers a central incisor in one exposure. The etched area around the lesion looks dull after the dam comes off, so thorough polishing matters for gloss and for stain resistance.
Proximal Technique
Proximal infiltration uses the same chemistry with more demanding access.
The supplied wedge provides separation after the dam is placed. For tight contacts, an orthodontic separator placed a few days earlier makes tip insertion much easier. The ADA guideline notes that most children in one primary-tooth trial reported light pain during separator placement, so a quick warning helps with young patients. Each material gets its own fresh tip, and the perforated side must face the lesion, which is easy to get wrong under a dam. The Icon-Dry preview is hard to read between teeth, so transillumination does more of the work here. Flossing before each cure prevents the contact from bonding shut.
Judging The Result
The appearance right after dam removal is misleading.
Dehydrated enamel around the treated area looks whiter than normal for the first day or so, which can make infiltrated areas look darker by comparison. The true result is visible once the teeth rehydrate, so final photos and any decision about re-treatment belong at a follow-up visit rather than at the end of the appointment.
Clinical Experience Across Case Types
Icon behaves differently depending on what caused the lesion, and the patterns below repeat across case types.
Post-Orthodontic White Spots
These are the most rewarding Icon cases and the best place to build confidence.
A typical case involves a young adult four to six months after debonding, with lesions on the maxillary anterior teeth. The centrals tend to show broad, shallow lesions near the gingival third that clear under Icon-Dry after one etch. Lateral incisors often carry smaller but chalkier lesions that need a second or third cycle. Six anterior teeth with mixed etch counts take close to an hour including isolation. At recall, shallow lesions blend fully, while the densest lateral lesion sometimes keeps a faint haze that shows only when the tooth is dried. A second infiltration on that tooth is simple if the patient wants it.
Lesions older than a few years behave more like fluorosis. The surface has remineralized, and more etching is needed to reach the porous body.
Fluorosis
Fluorotic enamel tends to resist the first etch cycle.
Diffuse white striations respond well once the surface is opened, but that often takes two or three cycles. Where the background shade is darker than the patient likes, in-office whitening a couple of weeks before infiltration reduces contrast and gives a more even result. Brown flecks remain brown after infiltration, and patients need to hear that before treatment.
MIH Opacities
MIH is where expectation management matters most.
White or cream incisor opacities often improve, but the hypomineralized zone can sit close to the dentin-enamel junction, far below the reach of the resin. The usual outcome is a softer, smaller opacity with a less defined border. Transillumination before treatment gives a fair idea of depth, and microabrasion followed by extended infiltration helps in some cases. Yellow-brown MIH lesions and sensitive, breaking-down molars are better served by restorative care.
Proximal Lesions
Proximal infiltration takes more setup, but it replaces a decision that used to be hard.
For an E2 or early D1 lesion in a high-risk teenager, the alternatives were monitoring or an early box preparation. Icon adds a third route that keeps the marginal ridge intact. The procedure is less dramatic than an esthetic case because nothing visible changes, and the value shows up at the next bitewing series when the lesion has not grown. Separation is the main friction point, and tight contacts make pre-separation worth the extra appointment.
What Patients Notice
Patients mostly react to two things, the lack of needles and the Icon-Dry preview.
No anesthesia is needed, and most patients tolerate the procedure well. The main complaint is jaw fatigue during long multi-tooth sessions behind a dam, which short breaks between teeth can ease. Showing the ethanol preview on an intraoral camera has a strong effect, because patients see the lesion disappear before any resin is placed. That moment tends to support case acceptance better than printed material. Patients who drink coffee daily generally show little staining on well-polished surfaces at recall.
The 2026 Protocol Update
DMG refreshed its North American Icon guidance in 2026 and released a clinical decision tree alongside it.
Transillumination is now part of diagnosis and monitoring, which helps separate caries-related lesions from fluorosis and other developmental opacities.
Infiltration times are longer, giving the resin more time to reach hypomineralized enamel.
Microabrasion and whitening appear as formal pre-treatment options.
The decision tree guides clinicians from lesion cause and severity to a specific protocol.
These changes match what experienced users were already doing. Transillumination with a device such as DIAGNOcam shows where the lesion sits in the enamel and how thick the intact surface is above it. That single reading predicts how many etch cycles a lesion will need better than the naked eye does.
What The Research Shows
The evidence for Icon is strongest for proximal caries and thinner for esthetic use.
The central proximal data come from a seven-year randomized split-mouth study by Paris and colleagues. Infiltrated lesions progressed in 9% of cases, compared with 45% of placebo-treated controls, and no adverse events were reported. The ADA guideline panel's network meta-analysis, published in 2018, also supported resin infiltration for noncavitated approximal lesions. A 2023 systematic review by Cebula and colleagues assessed the certainty of the evidence, and its author list includes researchers from DMG's clinical research department.
In primary molars, a two-year randomized study found progression in 24.1% of infiltrated lesions compared with 55.2% of controls, including in children at high caries risk.
Esthetic evidence rests mostly on clinical series. A retrospective study of 33 patients with developmental enamel defects reported improved appearance in all cases, with results holding at 24 months. Open research questions include water sorption of the unfilled resin and whether deproteinization with sodium hypochlorite before etching improves penetration.
Icon Versus Other Early Lesion Options
Icon sits between non-invasive care and restorations, and it often works alongside other treatments.
Approach | Enamel removed | Caries arrest | Esthetic effect | Main limitation |
|---|---|---|---|---|
Icon resin infiltration | About 40 µm per etch | Long-term RCT support for proximal lesions | Immediate in many cases | Isolation and no radiopacity |
5% sodium fluoride varnish | None | Supported, depends on recall | Slow and often incomplete | Repeat applications every 3 to 6 months |
Self-assembling peptide | None | Emerging evidence | Gradual | Smaller evidence base |
Proximal sealants | Minimal | Supported | Not applicable | Coating can wear or debond |
Microabrasion | Surface enamel | No | Good for superficial defects | Removes enamel |
Composite restoration | Significant | Yes, by removal | Good | Starts the restoration cycle |
In practice, fluoride varnish stays in the plan after infiltration for high-risk patients. Self-assembling peptide products such as Curodont suit patients who refuse any etching. Occlusal lesions remain the territory of sealants, since Icon's indications cover smooth and proximal surfaces. When a small surface defect sits inside an infiltrated area, composite can be bonded over the cured infiltrant in the same visit.
Fitting Icon Into Daily Practice
Icon needs no capital equipment, so adoption mostly comes down to scheduling and record keeping.
Scheduling works best with realistic blocks. A single facial lesion fits in 20 to 30 minutes, and a six-tooth esthetic case needs about an hour. Many practices book Icon at the first recall after debonding, which gives lesions time to settle and the gingiva time to recover from appliances.
Listing infiltration as a separate phase in the dental treatment plan keeps recall timing and possible re-treatment visible to the team. In the United States, CDT code D2990 covers resin infiltration of incipient smooth surface lesions. Coverage varies between payers, and many practices present esthetic infiltration as elective, so front-desk staff benefit from a refresher on CDT codes before quoting fees. Magnification also helps, and loupes make halo margins and residual haze easier to catch before the dam comes off.
Bottom Line
Icon resin infiltration is a well-supported option for non-cavitated proximal caries and a practical esthetic tool for caries-related white spots. The seven-year proximal data give it a deeper evidence base than most other micro-invasive options, and the single-visit workflow slots easily into recall and post-debond appointments. For lesions between E1 and D1 with an intact surface, Icon offers a documented step before any bur touches the tooth.
Esthetic results depend heavily on the lesion. Recent post-orthodontic white spots tend to blend well when the field stays dry and each lesion gets enough etch cycles, and the Icon-Dry preview shows during the appointment whether another cycle is needed. Fluorosis usually takes extra etching and sometimes whitening first. MIH patients should hear at the consultation that a smaller, softer opacity is the usual outcome.
Practices that see a steady flow of orthodontic patients or high-risk teenagers will get the most regular use from the kits. The upfront cost is low because patient packs replace any need for new equipment, although the technique asks for rubber dam isolation and patience with etch cycles. Every treated surface also needs a chart note, since the resin does not show on bitewings. A mini kit and a handful of recent anterior white spot cases give the team a low-risk way to learn the preview and etch rhythm before taking on developmental opacities or proximal work.
Verdict
<p>Icon remains the reference resin infiltrant, and chairside use confirms what the proximal caries data suggest.</p><p>For non-cavitated proximal lesions, Icon offers a documented alternative to watching a lesion or cutting a box preparation. The seven-year result of 9% progression against 45% in controls is hard to match with any other micro-invasive option.</p><p>On facial surfaces, results follow lesion type closely. Recent post-orthodontic white spots often disappear after one etch. Older lesions and fluorosis need more cycles, and MIH usually improves only partially. The Icon-Dry preview is the most useful feature in the kit, since it shows during the appointment whether another etch is needed.</p><p>The technique rewards patience and a dry field. Most disappointing results trace back to a wet field or to moving on after a single etch. Judging the shade before the teeth rehydrate causes needless re-treatment. The lack of radiopacity is a genuine drawback and makes chart notes part of every case.</p><p>Icon earns a place in general and pediatric practices that see early lesions often, and in any practice with a steady flow of post-orthodontic patients. Starting with recent white spots on anterior teeth is the fastest way to learn the preview and etch rhythm before taking on fluorosis or MIH.</p>
Frequently Asked Questions
What is Icon resin infiltration used for?
Icon arrests non-cavitated caries lesions on proximal and smooth surfaces, up to the outer third of dentin. It also improves the appearance of white spot lesions, including post-orthodontic decalcification and mild fluorosis.
Does Icon treatment need drilling or anesthesia?
No drilling is involved, and most patients need no anesthesia. The lesion is etched with acid and then filled with a light-cured resin.
How many etch cycles does a typical lesion need?
Recent post-orthodontic lesions often need one. Older lesions and fluorosis commonly need two or three, and DMG allows up to three 2-minute cycles per lesion.
Does Icon show up on X-rays?
No. The infiltrant is not radiopaque, so treated proximal lesions still look radiolucent. Every infiltrated surface should be recorded in the chart.
Is a rubber dam required for Icon?
DMG strongly recommends one. A light-cured liquid dam can work on labial surfaces, but cotton-roll isolation alone gives inconsistent results.
When should the final result be assessed?
At a follow-up visit. Teeth dehydrate under the dam, and the surrounding enamel looks whiter than normal until it rehydrates.
How long do Icon results last?
Proximal caries arrest has held in randomized trial data at seven years. Esthetic results have held at two years in a retrospective study, and good polishing limits surface staining.
Can Icon be used on primary teeth?
Yes. Randomized trials in primary molars show less proximal lesion progression than non-invasive care alone, including in high-risk children.
Does Icon work on MIH opacities?
Partially, in many cases. White or cream opacities often become smaller and softer, while yellow-brown lesions and breaking-down enamel usually need a restoration.
Can teeth be whitened before Icon treatment?
Yes, and whitening first often gives a more even result on fluorosis cases. Resin work is commonly delayed one to two weeks after bleaching because residual oxygen can interfere with polymerization.
Can composite be bonded over an infiltrated lesion?
Yes. The cured infiltrant bonds with methacrylate composites, so a small surface defect can be restored in the same visit.
Is Icon covered by dental insurance?
Coverage depends on the payer. In the United States, CDT code D2990 applies to resin infiltration of incipient smooth surface lesions, and many practices treat esthetic cases as elective.